This article will show you how to export a CSV file from our system, create a business manager, and add products to your Facebook Shop through the manager with the exported CSV file. Please follow the steps below.
Table of Content
Mark a Product with "Facebook/Instagram Export"
Export a CSV File for the Facebook/Instagram Store
Add Items to the Product Catalog
Set up the website URL
The first step is to set up the website URL in the POS system. If you leave this field empty, the CSV export for the Facebook catalog will not work.
1. Click "Settings"

2. Under Store Settings, under the website URL

3. Click "Save"

Mark a Product with "Facebook/Instagram Export"
In order for a product to show when the "Enabled" option is selected for the Facebook filter on the Products page, you have to first mark the product with "Facebook/Instagram Export" on its Add/Edit page.
Please follow the steps below:
1. Go to the Products page
2. Click "Add Product"
3. After filling in all the required information for creating a product, scroll to the bottom
4. Check the "Facebook/Instagram Export" checkbox

6. Click "Add Product"
Export a CSV File for the Facebook/Instagram Store
If you want to upload the products from your POS system to your Facebook/Instagram store, you have to first export the products from the POS system. This article will show you how to do that in your POS system. The step-by-step guide will be provided below.
1. Go to the Products page in your POS system
2. Click on the "Facebook" filter and click "Enabled". After you set this filter, only the products marked with "Facebook/Instagram Export" will be shown on the list. To mark a product with "Facebook/Instagram Export", please follow this article.

3. A file should be downloaded to your computer. Please use it to upload products to your Facebook product catalog.
To find the file on your computer
Chrome web browser
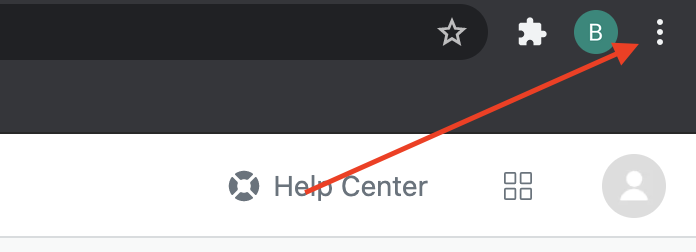
1. Click on the 3-dot icon at the top-right corner on your browser

2. Select Downloads
3. You should see the file that you just downloaded shows at the top of the list
4. Click "Show in Finder" for Mac OS computers. Or It will say "Show in Folder" for Windows computers.
Safari web browser
1. Please go to the Downloads folder in the Finder app
Add Items to the Product Catalog
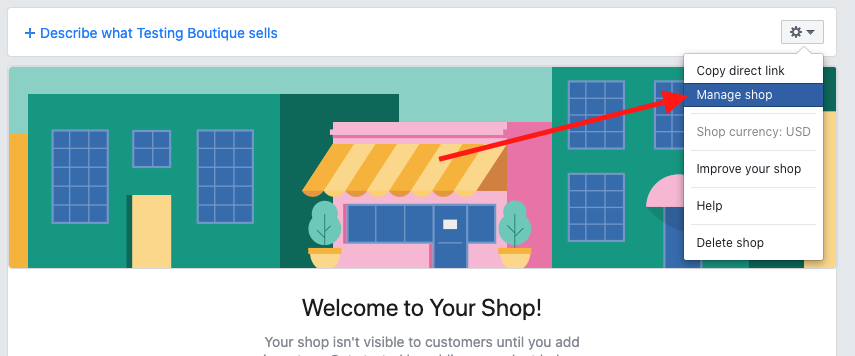
1. Click the settings icon on the Shop page and click "Manage shop"
2. Click "Catalog" on the menu and make sure the current catalog is the catalog you just created above.

3. Click "Add Products".

4. Select "Use Bulk Upload" and click "Next".

5. Select "File upload" as the upload option. And click "Next".

6. Upload a file that conforms to the format specified by Facebook. The guide to the file format: https://www.facebook.com/business/help/1898524300466211?id=725943027795860. After uploading the products file, click "Next".

7. Click "Upload".

8. Please wait until the products are successfully uploaded to the catalog.
Next Up
How to connect a Facebook product catalog to an Instagram account
How to update products in your Facebook product catalog
How to remove products in your Facebook product catalog
Comments
0 comments
Please sign in to leave a comment.