Welcome! This article will include all of the necessary information needed to get your POS account set up and help understand how to navigate the Web app.
Step 1: Login to SPOS
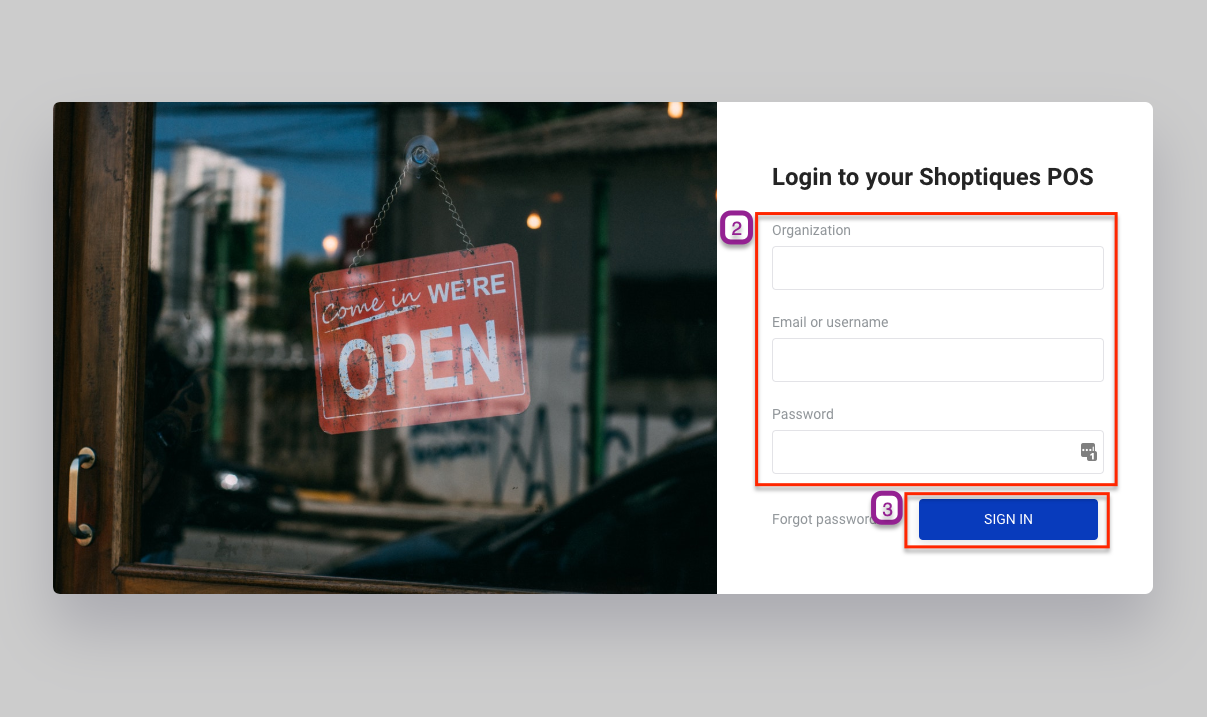
- Navigate to the Web app login page.
- Enter the appropriate login credentials for organization, email/username, and password.(Reach out to your Shoptiques Account Manager if you do not remember your credentials)
- Click the blue "Sign In" button.
Step 2: Add Employees
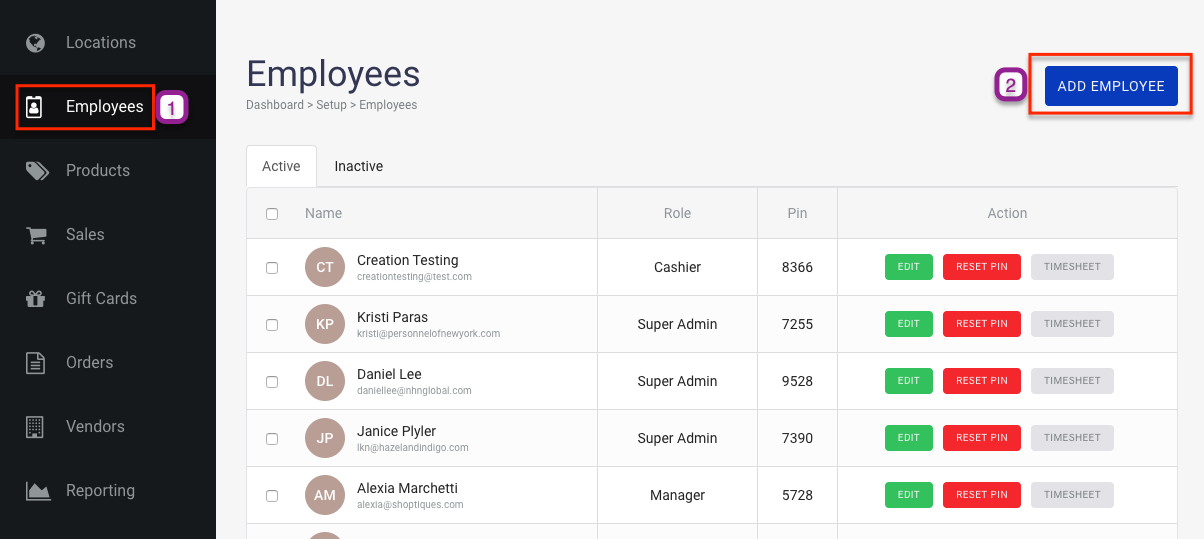
- Click on the "Employees" tab on the navigation bar to the left.
- Click on the blue "Add Employee" button located on the top-right corner of the "Employees" page.
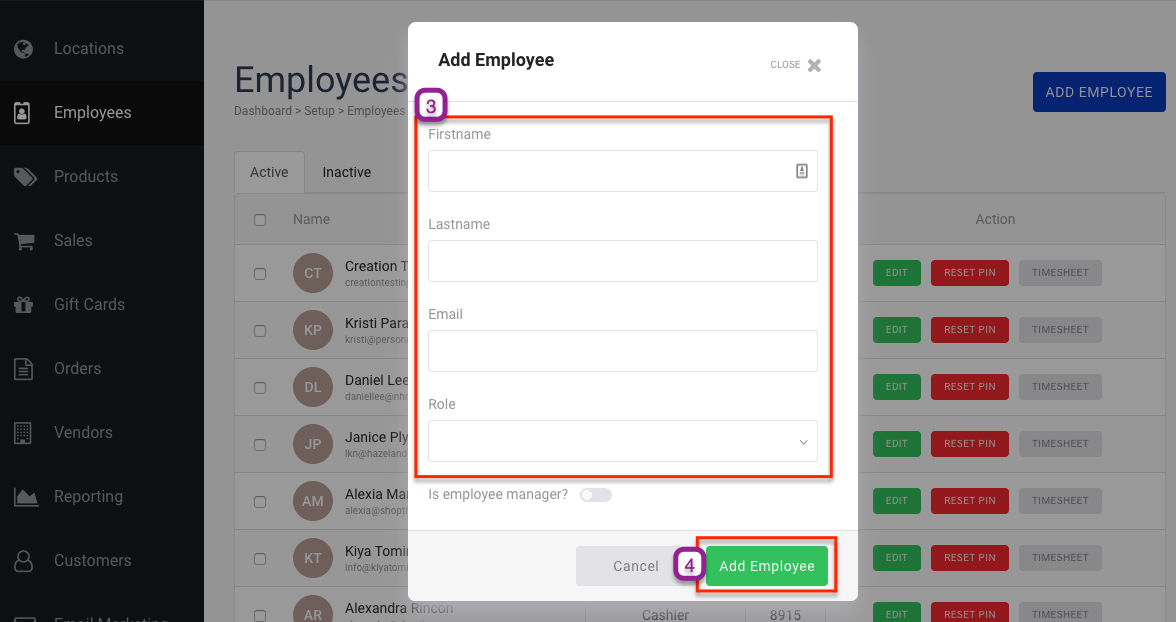
- In the "Add Employee" pop-up that appeared, enter the employee's first name, last name, email, and choose a role from the five options.
- Once you have filled out the fields, click the green "Add Employee" button on the bottom-right corner of the pop-up.
- The employee will now show up in the list. Note that each employee has a designated PIN that is used to login/clock in to the iPad app.
Step 3: Add Products
There are two ways to add products to your POS account; you can import a CSV file with the products or you can add each product manually.
Importing Products with CSV
- Please refer to our Import Products article to learn how to add products using a CSV file.
Adding Products Manually
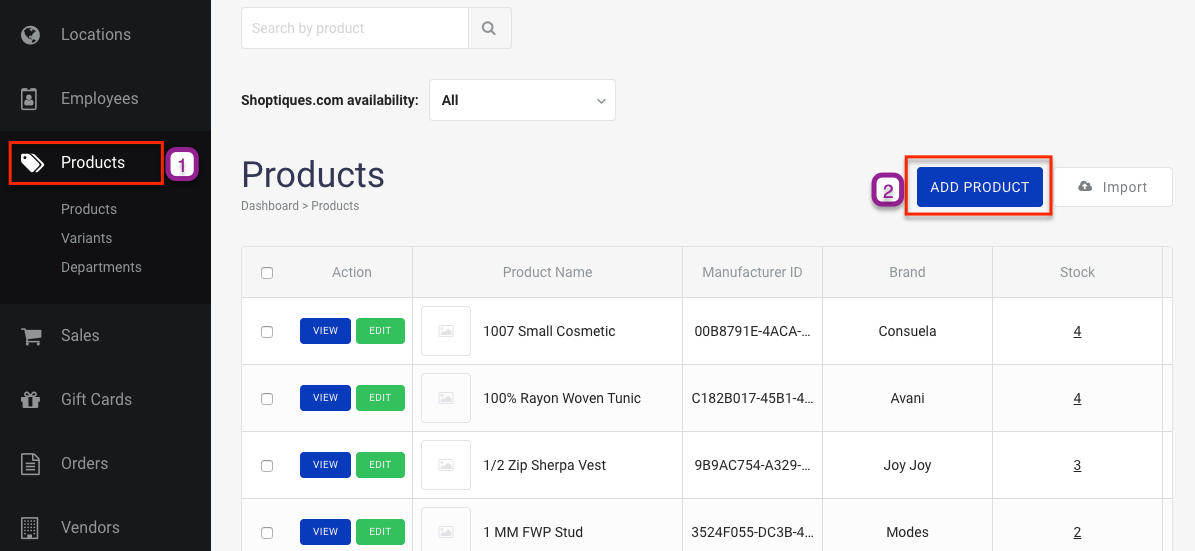
- Click on the "Products" tab on the navigation bar to the left.
- Click on the blue "Add Product" button located on the top-right corner of the "Products" page.
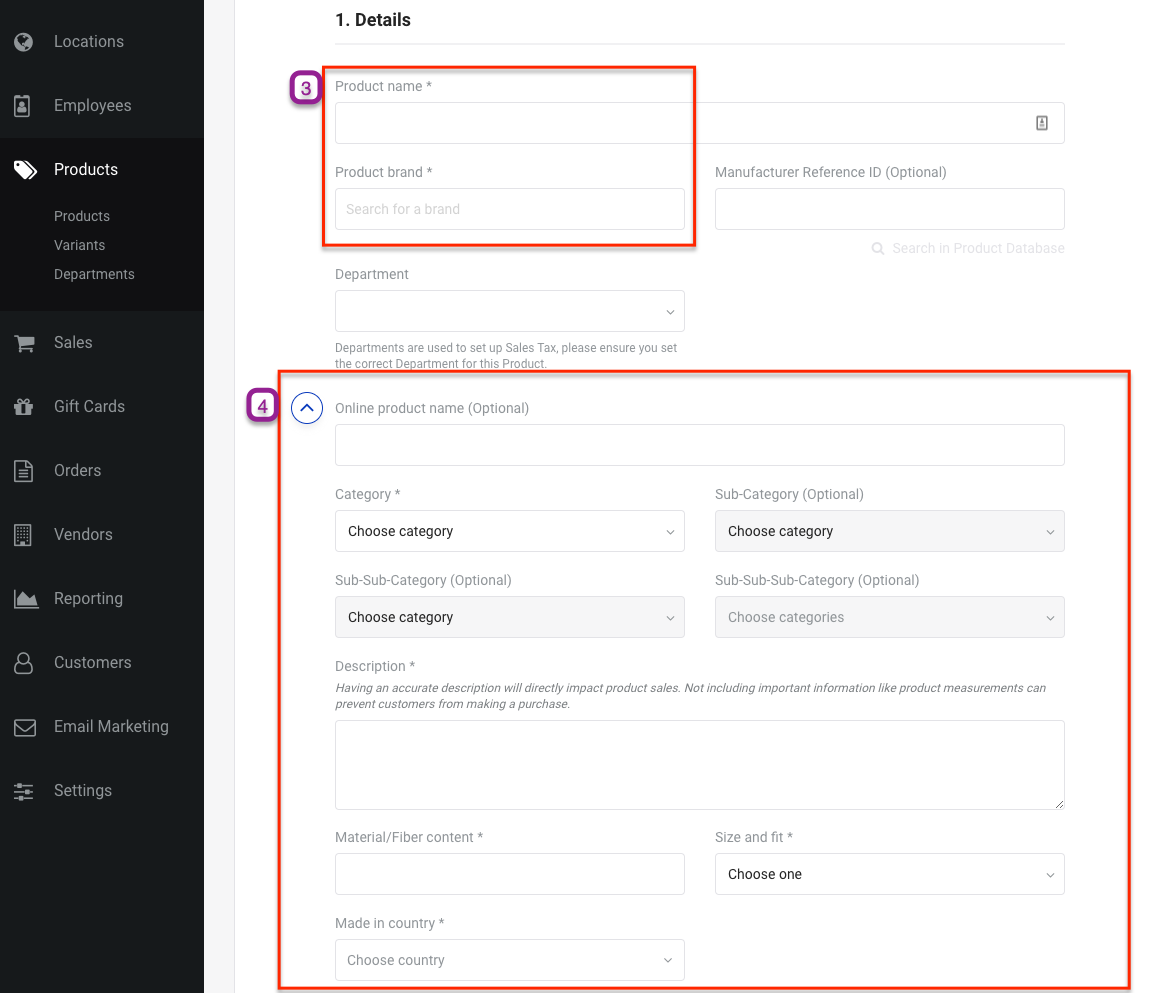
- In the "Details" section, fill out the Product name and Product brand.
- If you want to upload and sell the product on Shoptiques.com, then click the "Expand Info Needed to Sell Product Online" button. Fill out the required fields which are marked with an asterisk (*).
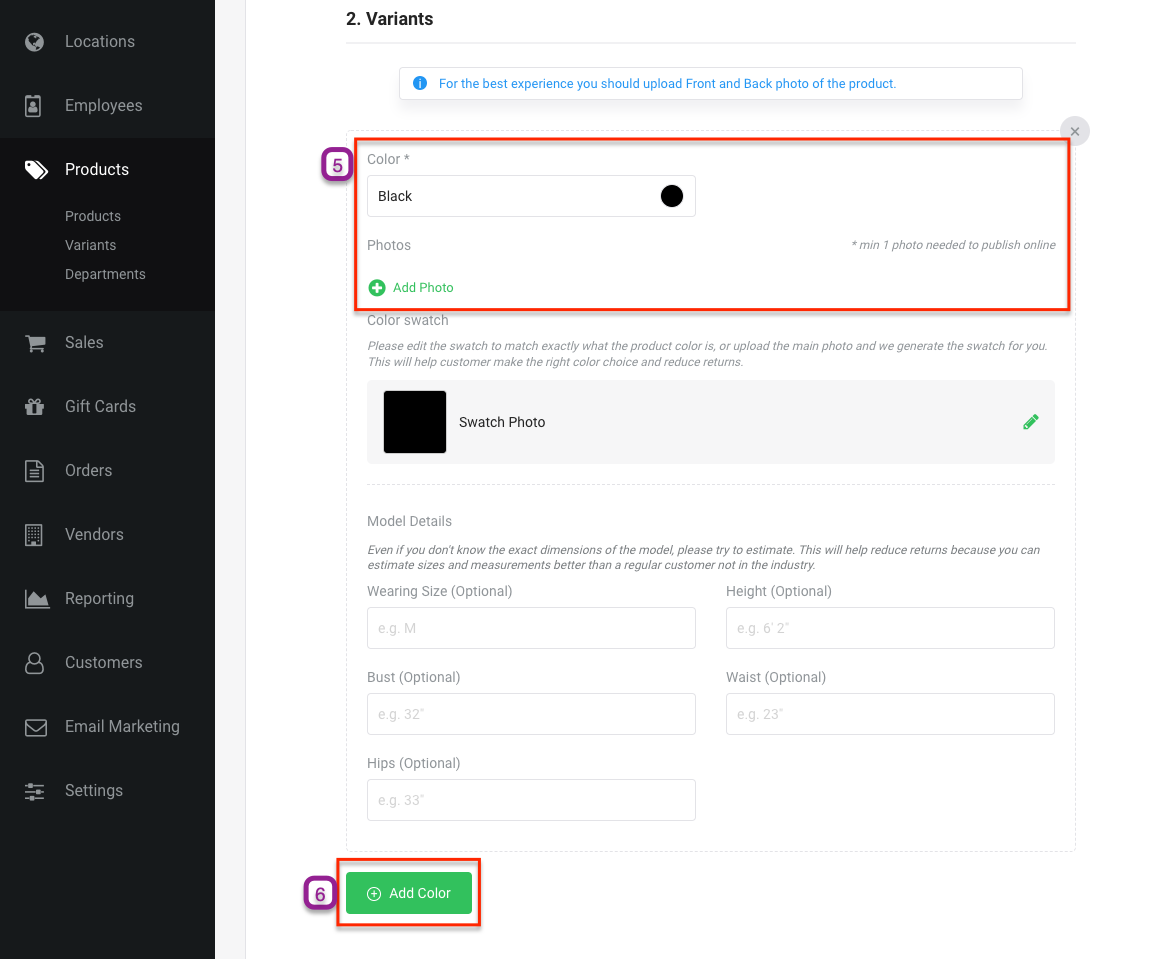
- In the "Variants" section, fill out the color field and upload the product's photos.
- If you have more than one color for the product, click the green "Add Color" button to add another color variant.
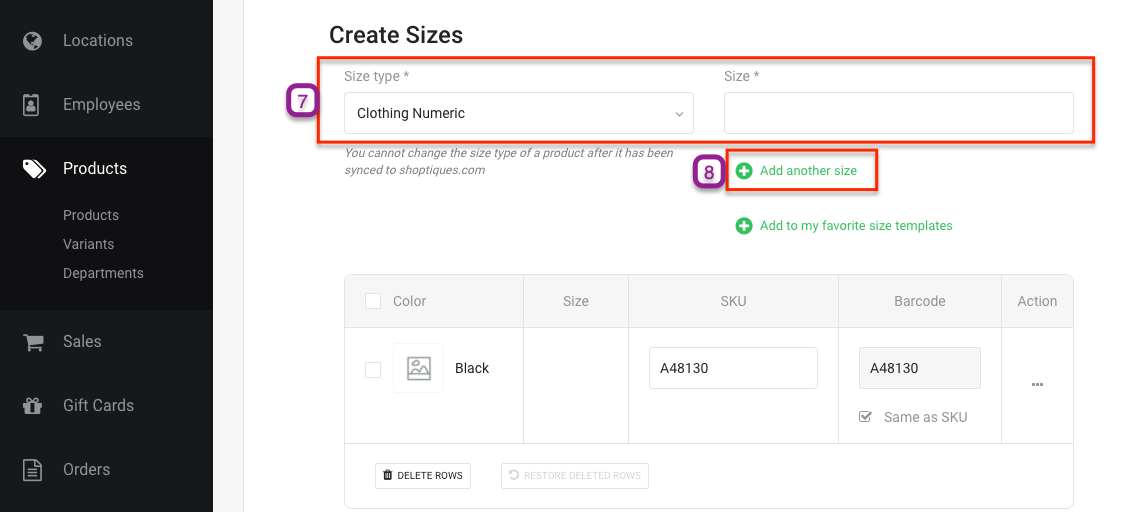
- To create sizes, first choose a Size Type. Then, enter the size in the box that appears.
- If you have more than one size available, click the green "Add Another Size" text button.
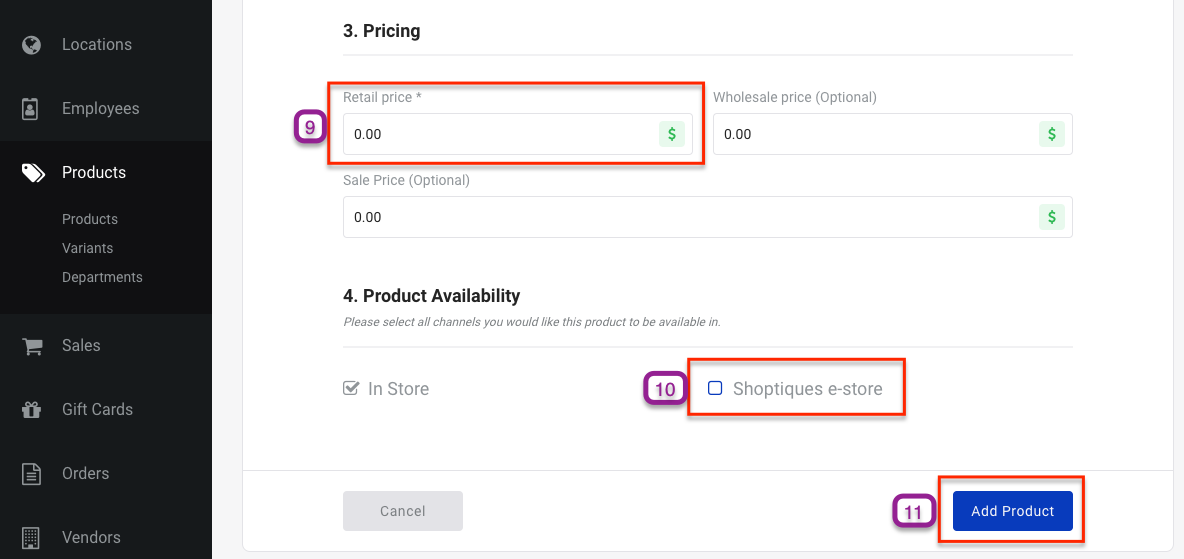
- In the "Pricing" section, enter the Retail Price.
- In the "Product Availability" section, if you want to upload the product to Shoptiques.com, check the box next to Shoptiques E-Store.
- Click the blue "Add Product" button at the bottom-right corner of the page.
Step 4: Set Up Label Printer
- Insert the power adapter cable into the DC power connector on the Dymo printer and the other end into a power outlet.
- Insert the USB cable into the USB connector on the Dymo printer and the other end into your computer.
- Lift the top cover of the Dymo printer and on the inside you will see a label spool, which you need to take out.
- Take the label roll and place it on the spool. Put the spool back to its original location in the printer.
- Take the end of the label roll and insert it into the label feed.
- Align the position of label guide to rest right next to the label roll.
- Close the top lid of the Dymo printer.
- Download the required Dymo label printing software here onto your computer.
To learn how to print the labels, please refer to our Printing Labels article.
Step 5: Add Vendors
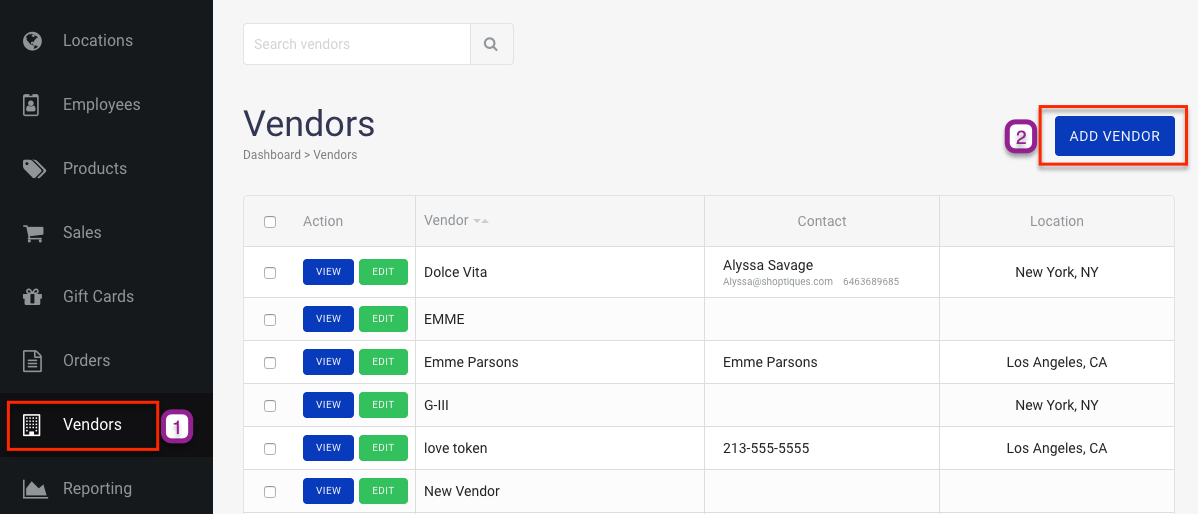
- Click on the "Vendors" tab on the navigation bar to the left.
- Click on the blue "Add Vendor" button located on the top-right corner of the "Vendors" page.
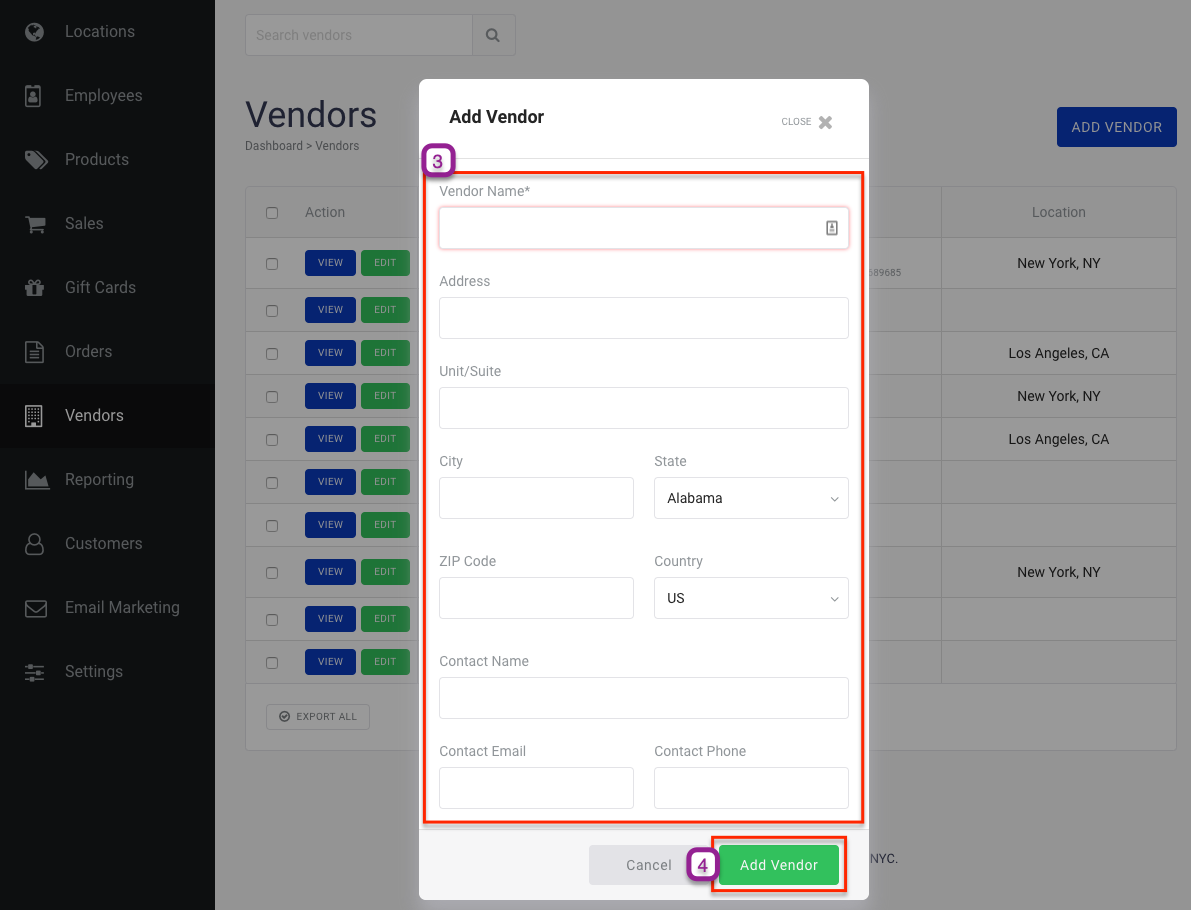
- Fill out the required field (*) and the vendor's address and contact information if necessary.
- Once you have filled out the fields, click the green "Add Vendor" button on the bottom-right corner of the pop-up.
Step 6: Add Sales Tax
Please refer to our Sales Tax article to learn how to create a Sales Tax.
Step 7: Location Settings
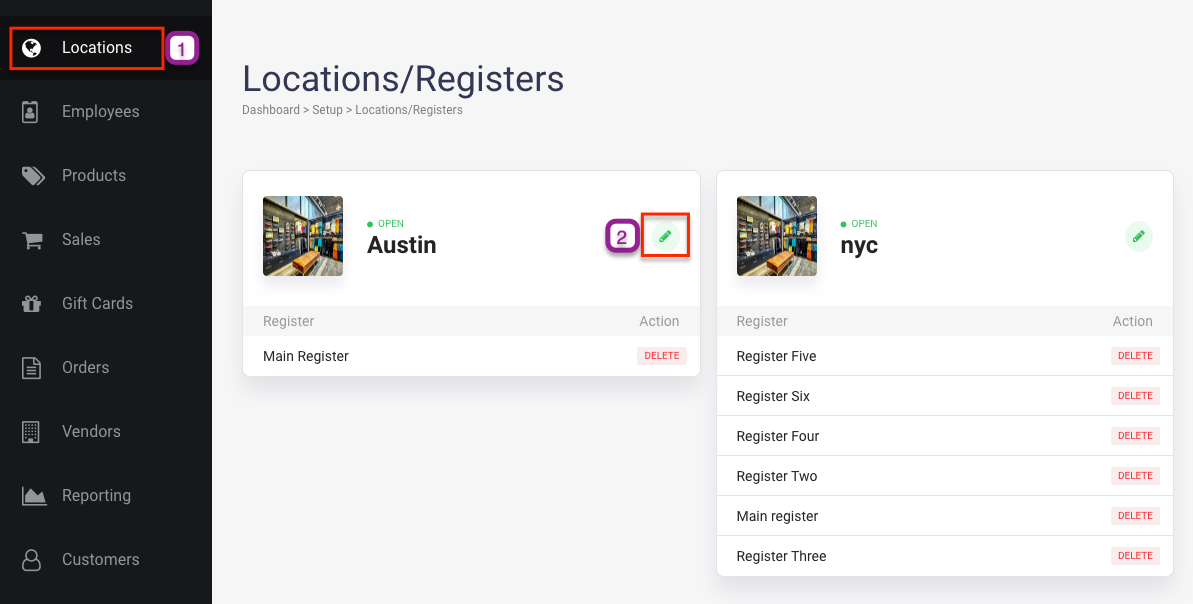
- Click on the "Locations" tab on the navigation bar to the left.
- Click on the green edit button for a location.
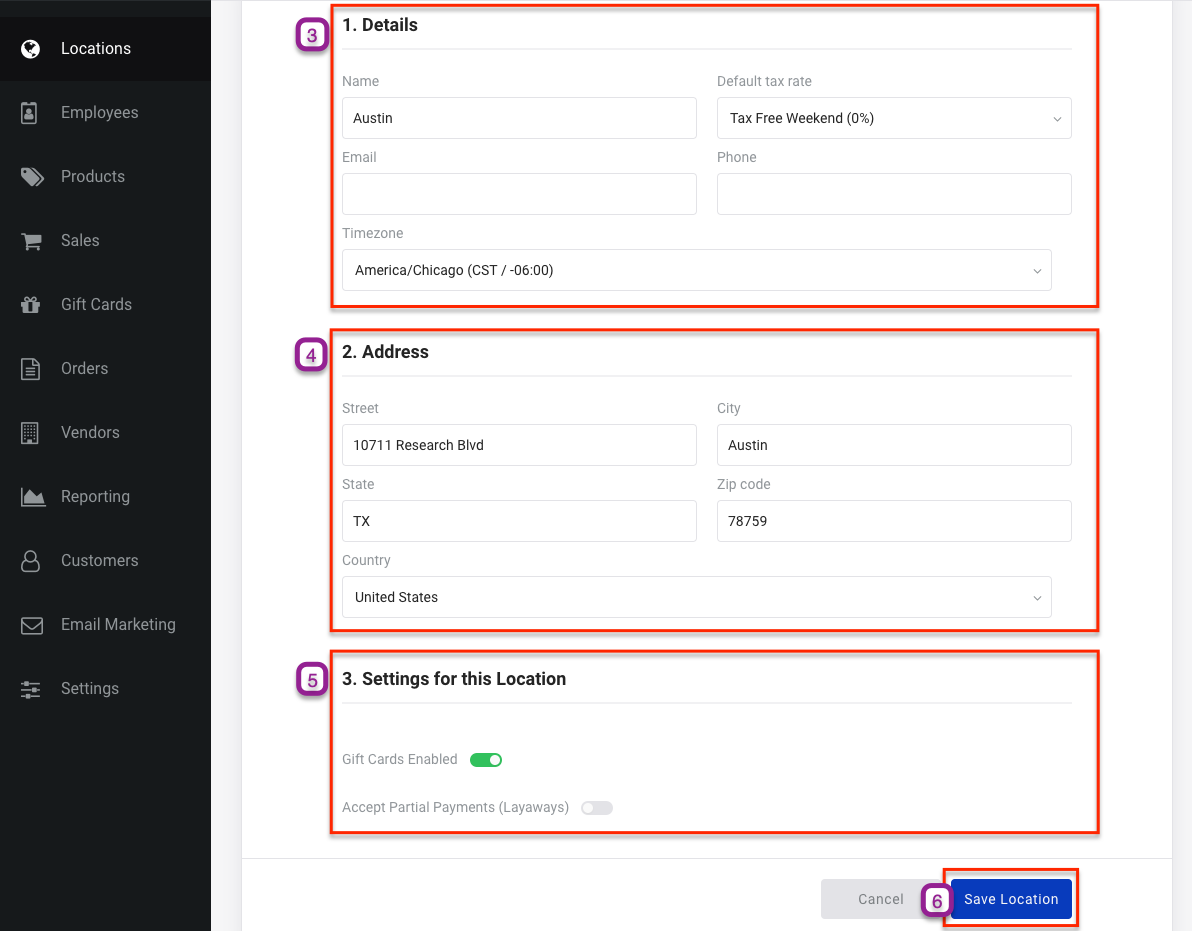
- In the "Details" section, enter your location name, email, and phone number. In addition, designate the time-zone and a default tax-rate for store's location.
- In the "Address" section, enter your store's address including the street, city, state, zip-code, and country.
- In the "Settings for this Location" section, enable/disable Gift Cards and Layaways.
- Click the blue "Save Location" button on the bottom-right corner of the page.
- Repeat steps 2-6 if you have more than one location.
Step 8: Set Up Employee Permissions
Please refer to our Employee Permissions article on how to set up and customize your permission settings for each role.
Step 9: Set Up QuickBooks (If Necessary)
Please refer to our QuickBooks Overview article to learn how to integrate your QuickBooks account with your Shoptiques POS account.
Comments
0 comments
Please sign in to leave a comment.